Submission Guide
This guideline will explain how to submit the data necessary for your exhibition. The submitted data will be displayed on the space set up in VRChat and Vket Cloud as well as the catalog on the official website.
Table of contents
- Schedule
- How to sell/distribute
- Catalog data registration and changes
- Data submission for exhibition space (Standard Plan)
- Data submission for exhibition space (Simple Plan)
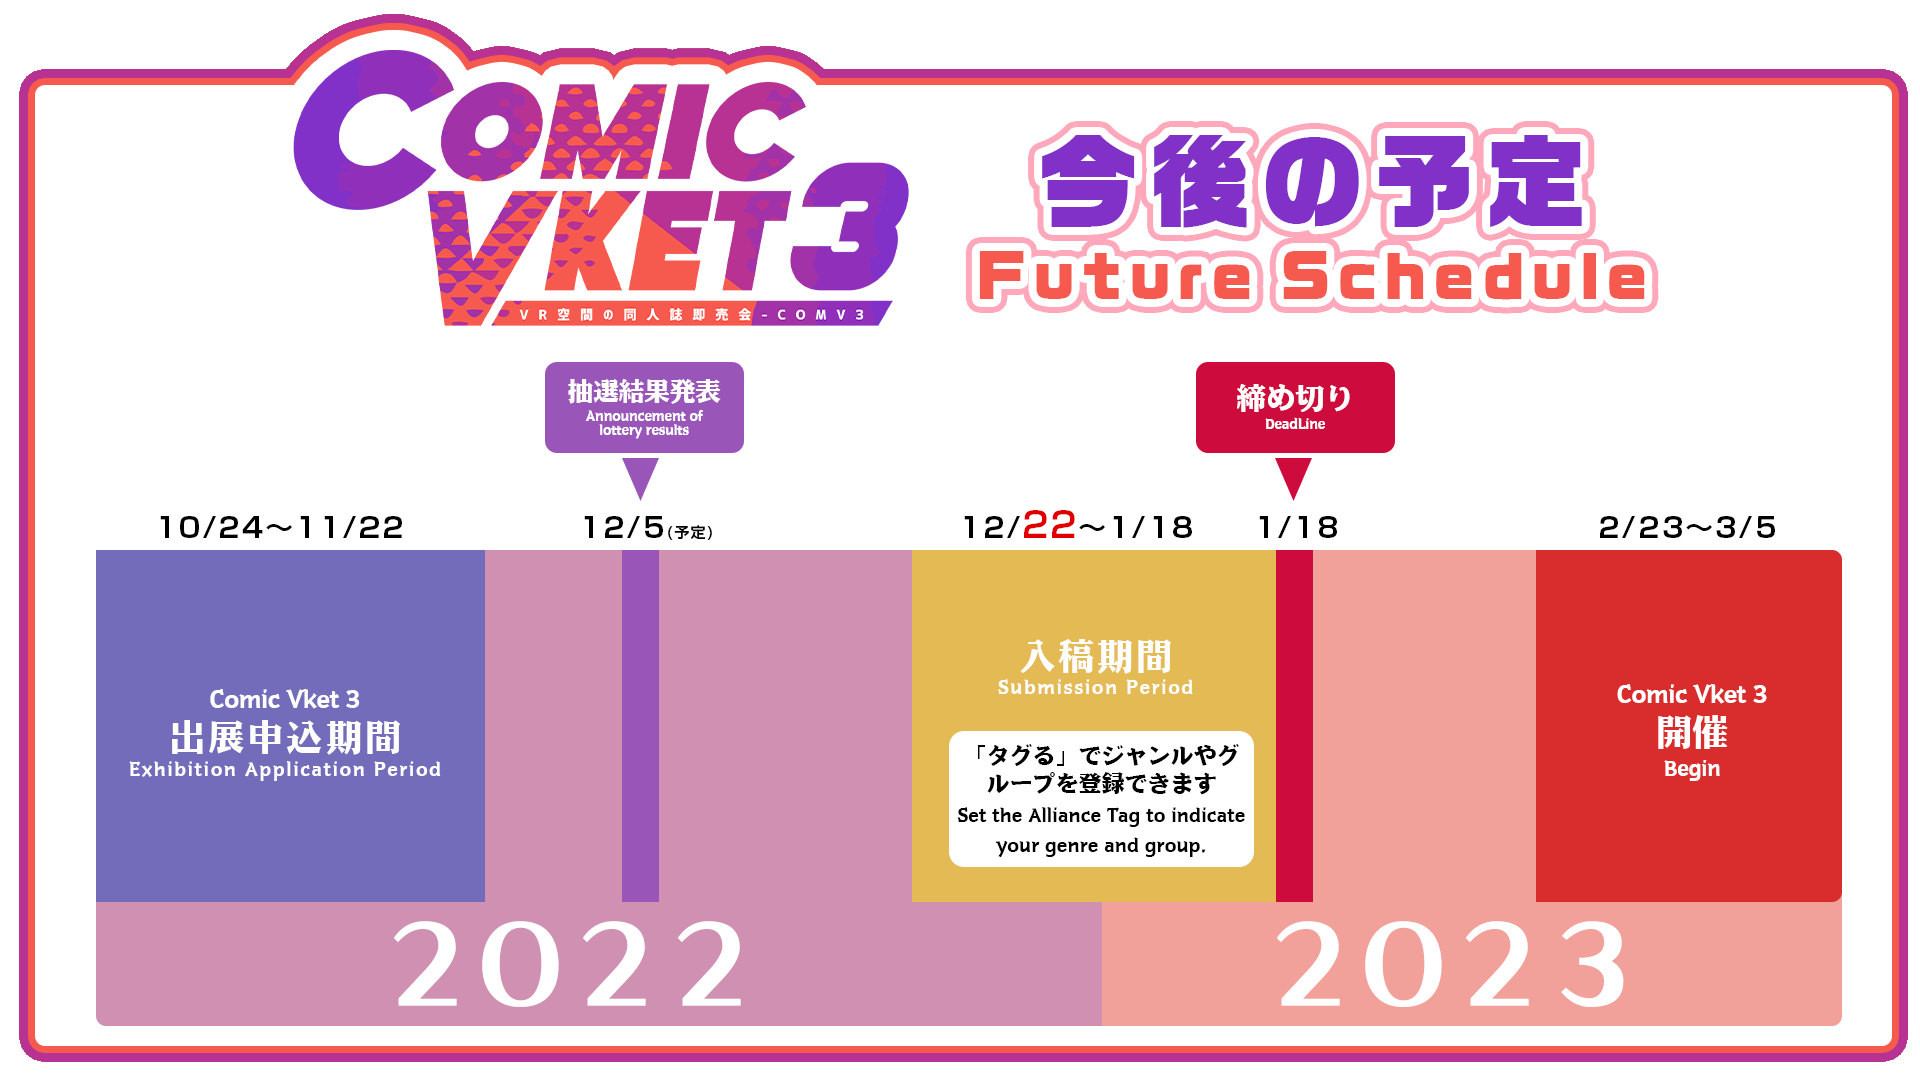
1. Schedule
| Dec. 22, 2022 to Jan. 18, 2023 | Exhibition space submission period |
| Around February | Catalog goes public |
| Feb. 23 to Mar. 5 | ComicVket 3 opens |
*Note that Catalog webpage will go public only after the submission deadline.
2. How to sell/distribute
The exhibit books or assets need to be ready for download or purchase before the event opening.
If you are selling downloadable contents, you can use download sales platform like Vket Store, and if physical books you can use consignment services. You may choose whatever you like without restrictions or limitations.
3. Catalog data registration and changes
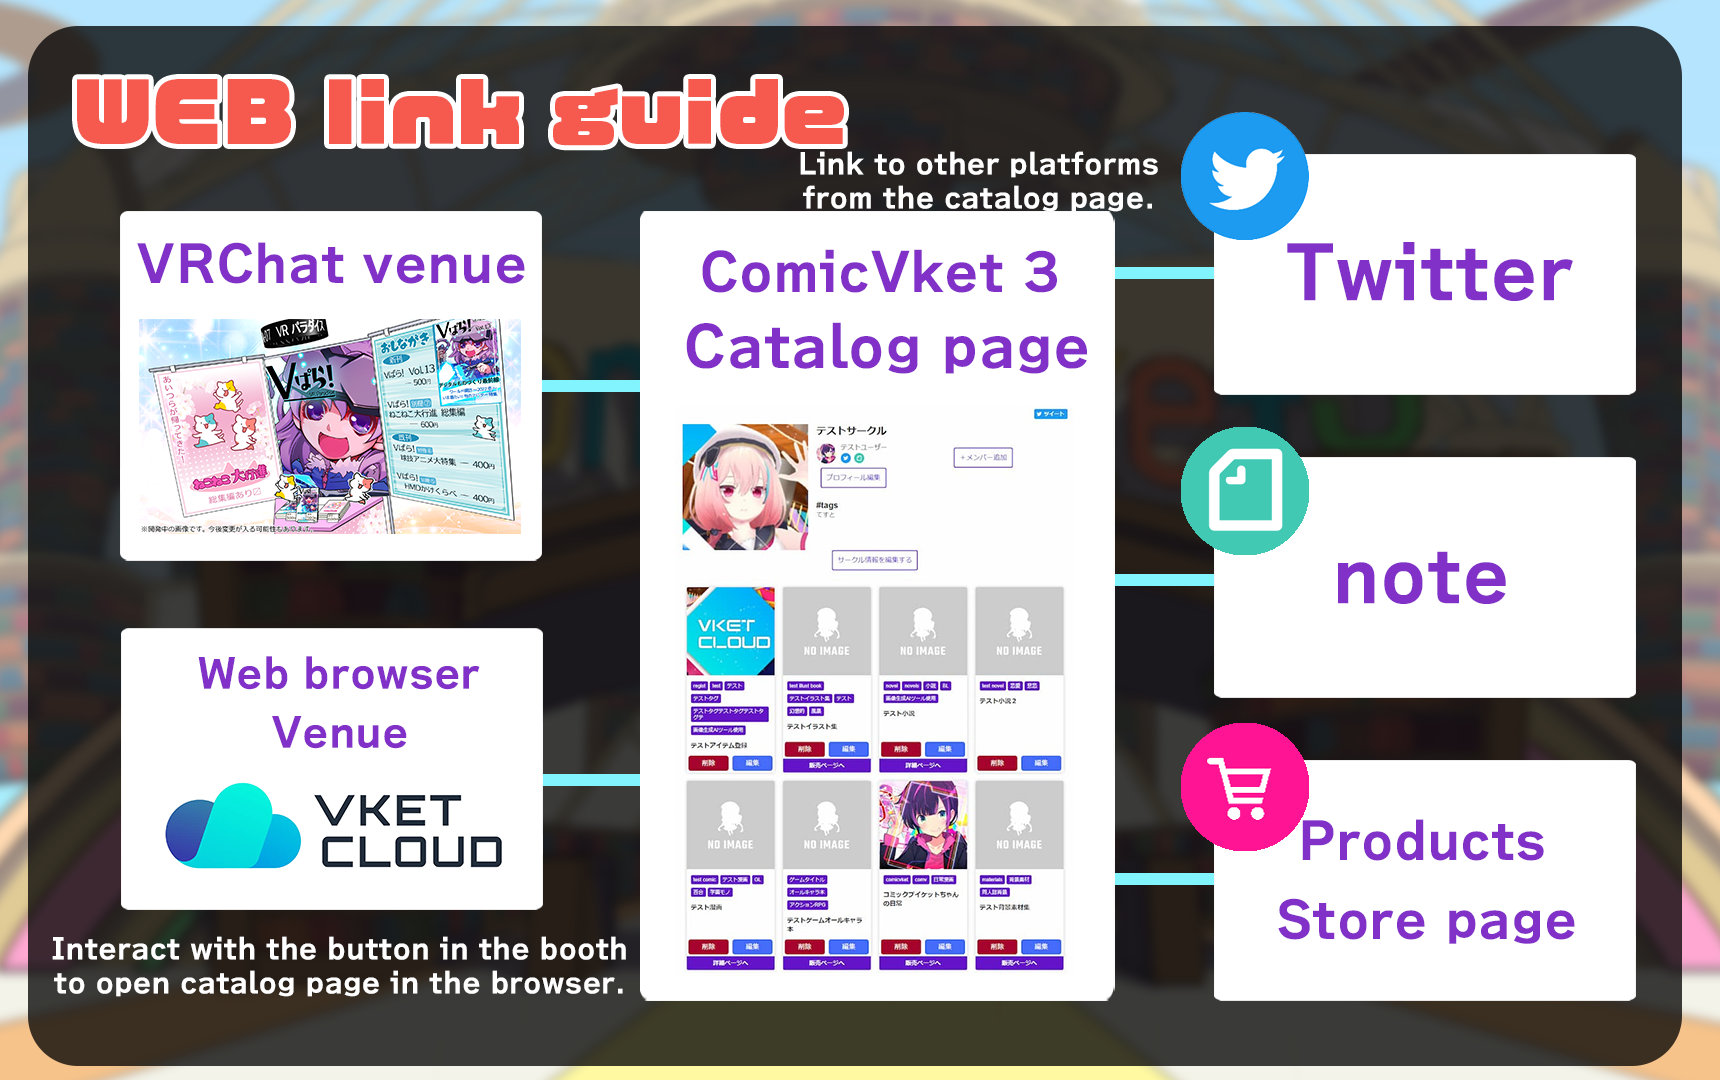
In ComicVket 3 official website, information about exhibitors and exhibited products will be displayed on this website as "catalog."
The exhibitor's circle page can be opened by visitors when they open the external link from the space in the venue or search in the website. Here, you can explain your product in detail and place link to the sales/distribution platform.
You can edit the information on the website catalog by registering and modifying "User Profile" and "Manage Circle Information and Catalog" in the "MyPage" of the website.
Profile
Register the profile of representatives or members of the exhibitor circle as an individual.
*All information registered in the Profile page except for the Vket ID, will be displayed in the catalog page of official website.
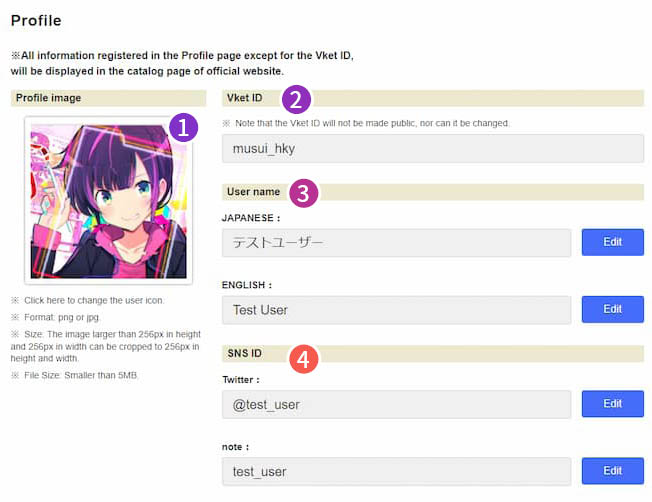
①Profile image
*Click here to change the user icon.
*Format: png or jpg.
*Size: The image larger than 256px in height and 256px in width can be cropped to 256px in height and width.
*File Size: Smaller than 5MB
②Vket ID: Vket ID of representative
*Note that the Vket ID will not be made public, nor can it be changed.
③User name (Japanese and English)
④SNS ID (Twitter/note): IDs of Twitter/note
Manage Circle Information and Catalog
Register information about the exhibitor circle itself, such as product information, that will be displayed on the catalog page of official website.
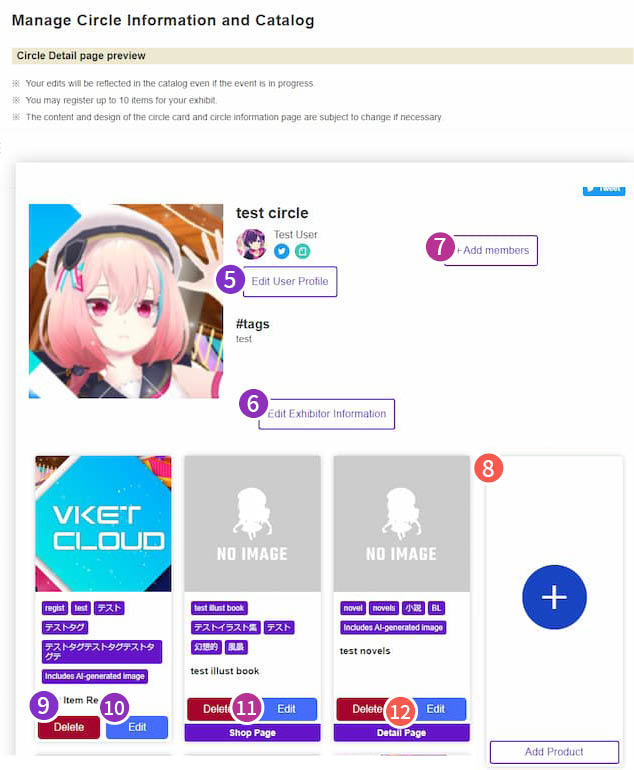
*Your edits will be reflected in the catalog even if the event is in progress.
*You may register up to 10 items for your exhibit.
*The content and design of the circle card and circle information page are subject to change if necessary.
⑤Edit User Profile: Click here to go to "Profile" page (described above).
⑥Edit Exhibitor Information: Click here to go to "Circle Management" page (described below).
⑦+Add members: Click here to go to "Circle member Management" page (described below).
⑧Add Product: Click here to go to "Catalog Management" page (described below).
⑨Delete: You can delete a product.
⑩Edit: Click here to go to "Catalog Management" page.
⑪Shop page: This will appear when you select "Sold" on the "Catalog Management" page.
⑫Detail page: This will appear when you select "Exhibition only" on the "Catalog Management" page.
Circle Management
*Your edits will be reflected in the catalog even if the event is in progress.
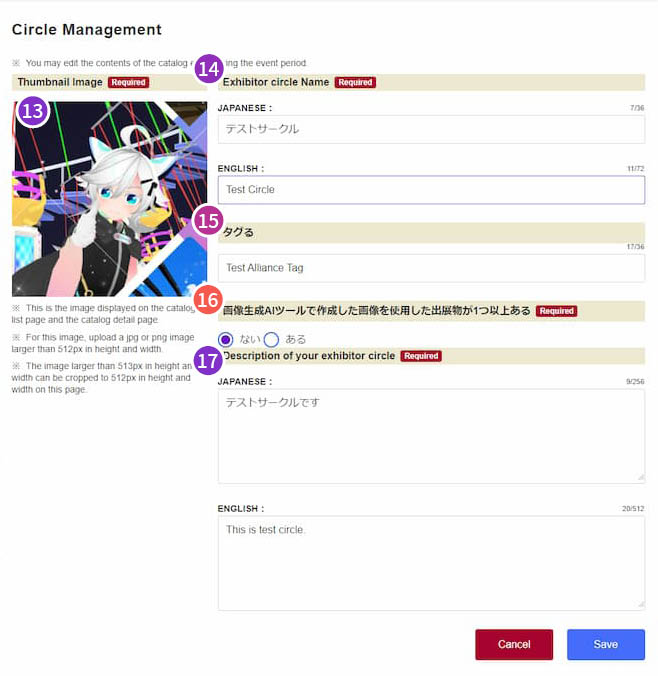
⑬Thumbnail Image
*This is the image displayed on the catalog list page and the catalog detail page.
*For this image, upload a jpg or png image larger than 512px in height and width.
*The image larger than 512px in height and width can be cropped to 512px in height and width on this page.
⑭Exhibitor circle Name (Japanese and English)
⑮タグる: Keywords to promote uniqueness, such as specific genres or couplings
*Only one tag can be registered.
⑯画像生成AIツールで作成した画像を使用した出展物が1つ以上ある (Includes AI-generated image): Select "ない(No)" or "ある(Yes)".
⑰Description of your exhibitor circle (Japanese and English): Description and PR texts
Catalog Management
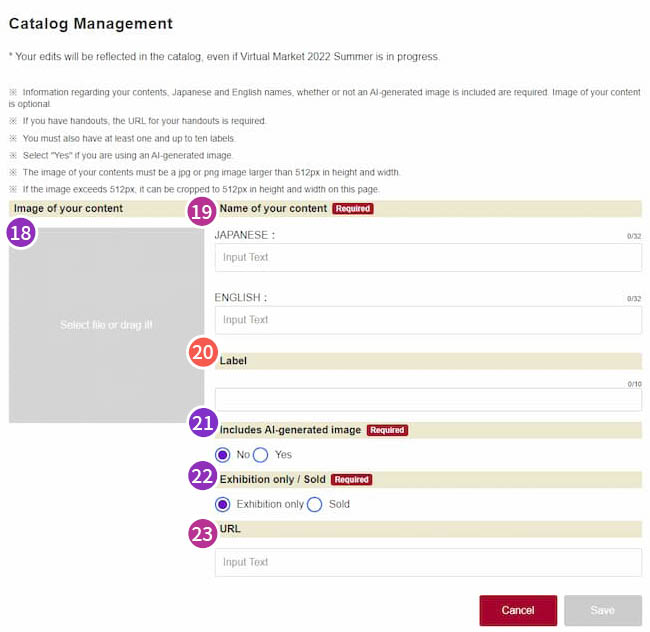
⑱Image of your content: Optional
*The image must be a jpg or png image larger than 512px in height and width.
*If the image exceeds 512px, it can be cropped to 512px in height and width on this page.
⑲Name of your content (Japanese and English)
⑳Label: Keywords that describe the category of exhibits
*You must also have at least one and up to ten labels. You can register a label by pressing Enter key.
㉑Includes AI-generated image
*If you choose "Yes", "Includes AI-generated image" lable will be added automatically.
㉒Exhibition only / Available in store
㉓URL: Link to individual products
Member registration
Members of the exhibitors will be displaed on the catalog webpages of the official website. Namely, the names will appear on the list of circles and circle detail page.
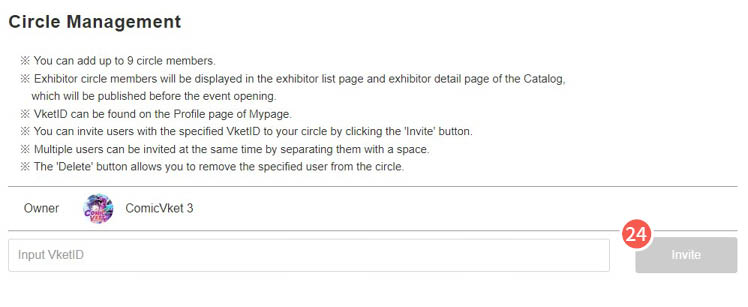
㉔Invite member: Specify the Vket ID of the user you wish to invite as a member of your exhibitor circle. The Vket ID can be found at the Profile in Mypage ②.
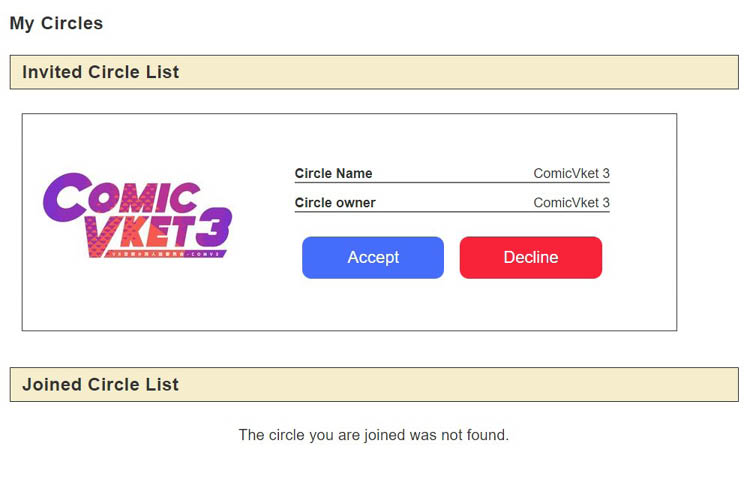
The invitee can become a member by selecting Accept in the below webpage.
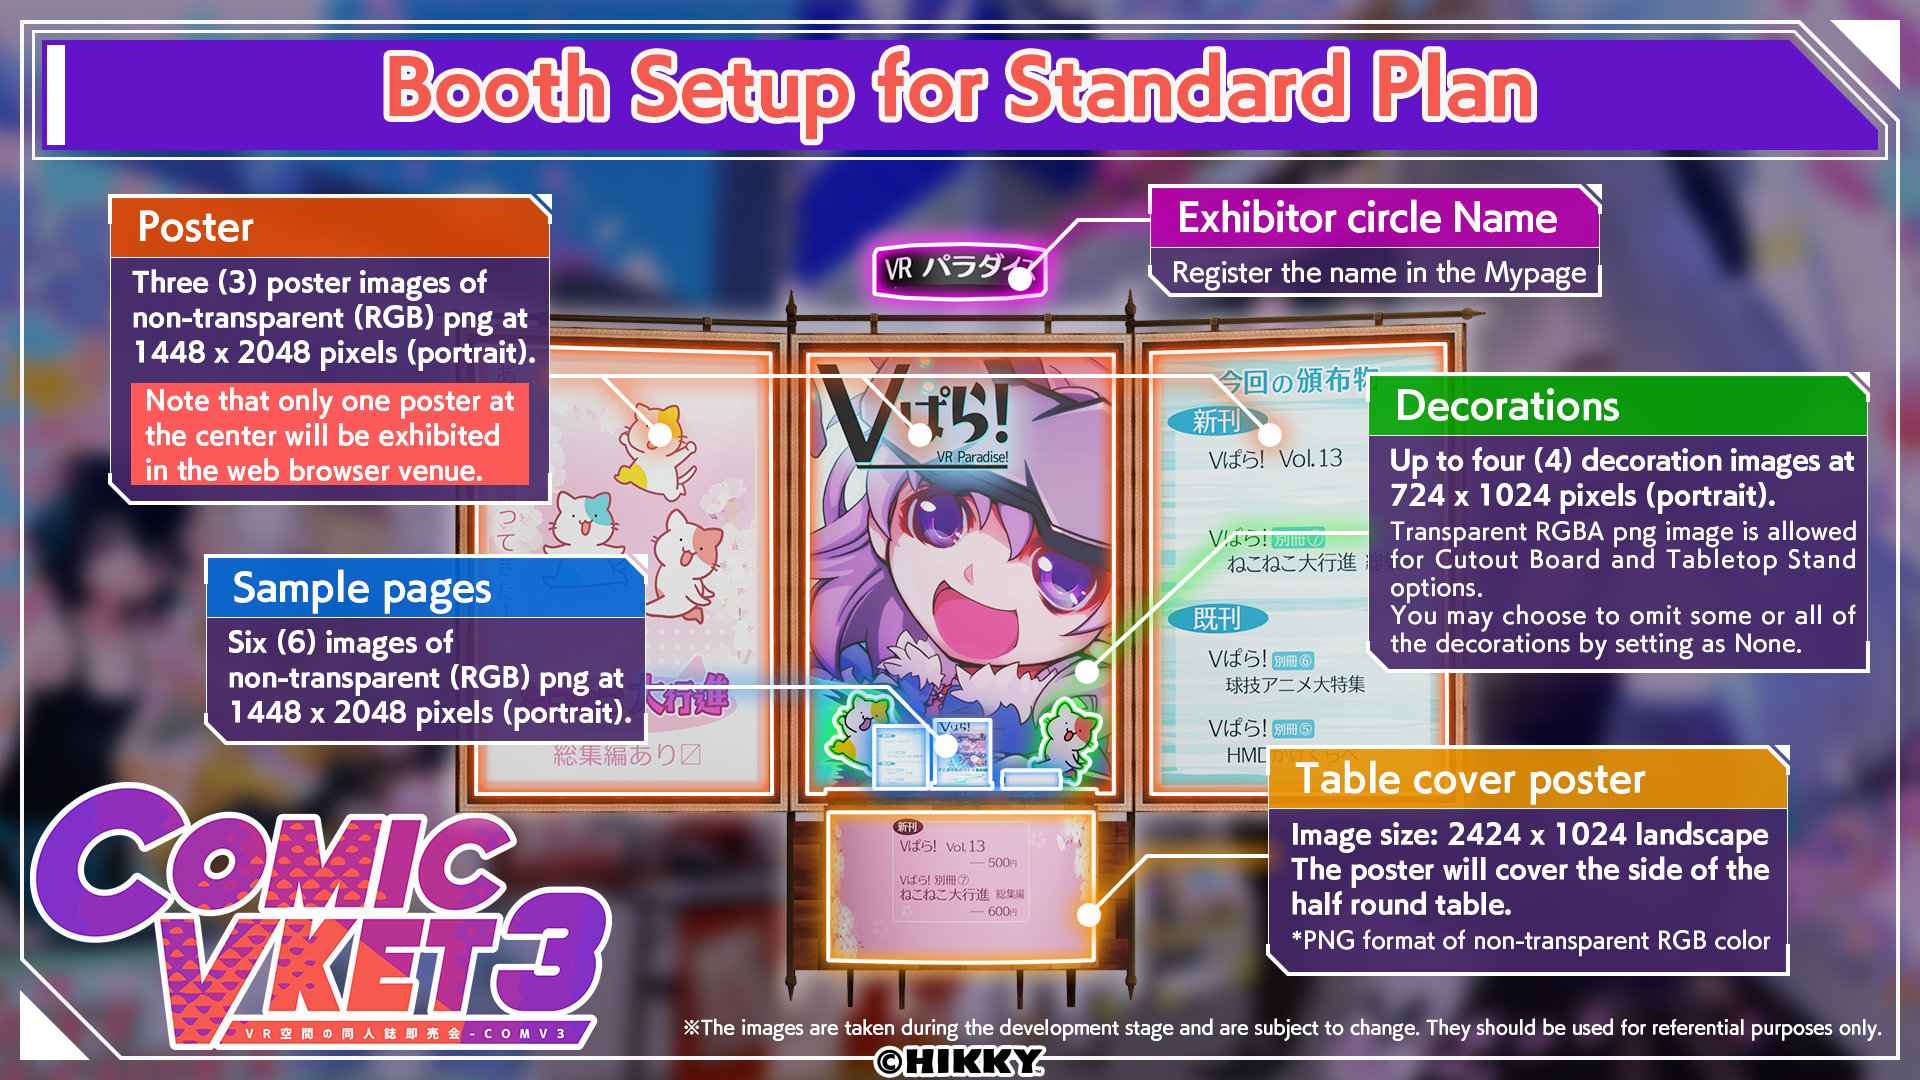
4. Data submission for exhibition space (Standard Plan)
With the Standard Plan, you can easily set up a three-dimensional "space" from the official website.
Necessary files
The below files need to be submitted.
| Category | Number | Size | Format | Color |
|---|---|---|---|---|
| Poster | Three (3) | 1448 x 2048 px (portrait) | png | non-transparent (RGB) |
| Sample pages | Six (6) | 1448 x 2048 px (portrait) | png | non-transparent (RGB) |
| Decorations | Up to four (4) | 724 x 1024 px (portrait) | png | Transparent RGBA png image is allowed for certain options |
| Table cover poster | Single (1) | 2424 x 1024 px (landscape) | png | non-transparent (RGB) |
*Note that only one poster at the center will be exhibited in the web browser venue.
*The table cover poster should cover all of the left side, front side, and right side at 808 x 1024 portrait size each.
*Images smaller than the above specifications will be automatically enlarged.
Submission Procedure (Windows)
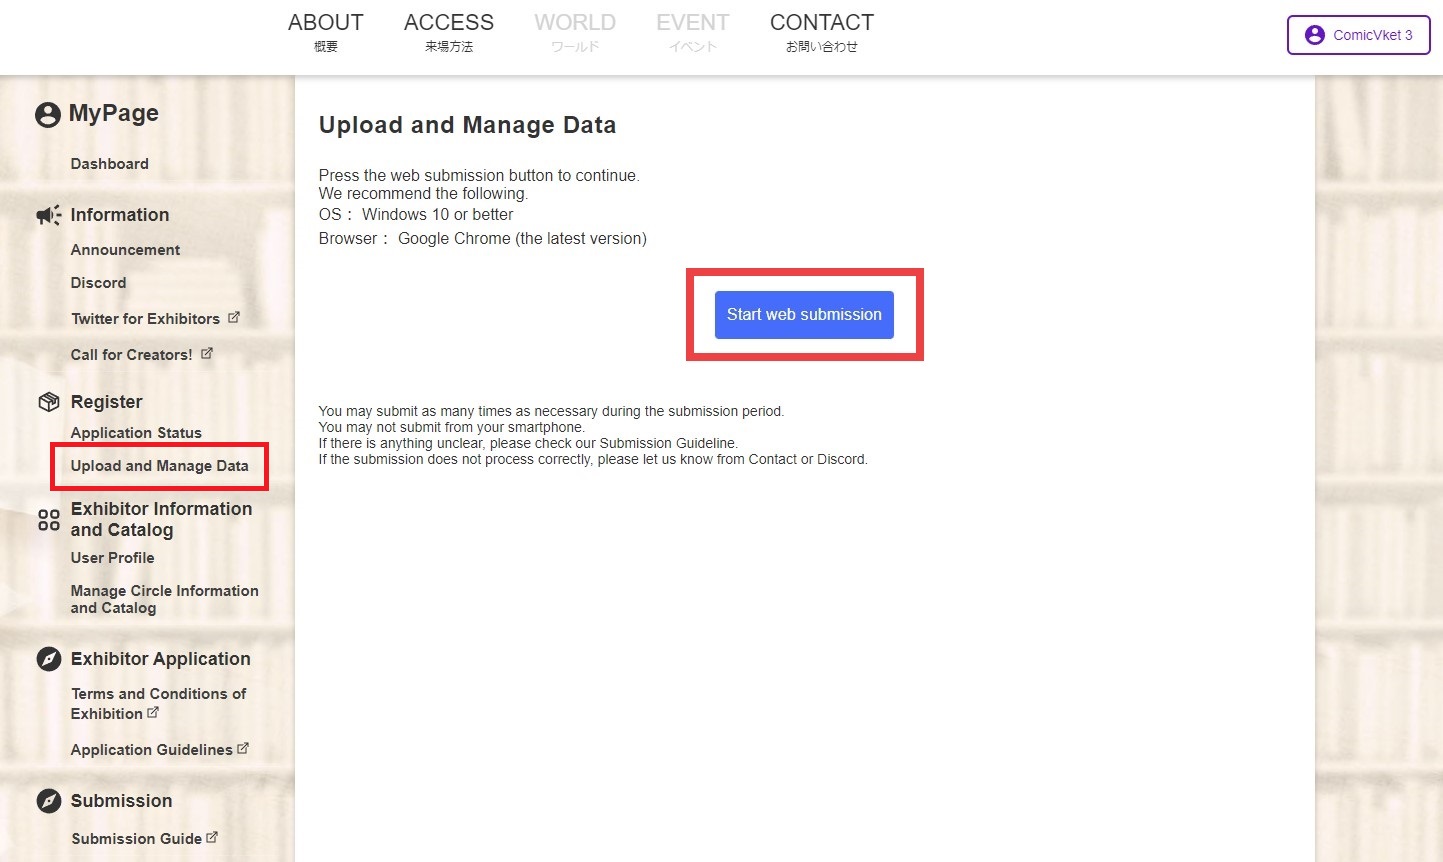
Once the files are ready let's move on to upload them. Click "Start Web Submission" in "Upload and Manage Data" page under "MyPage".
The recommended environment:
- OS: Windows
- Browser: Google Chrome
Instructions on how to submit files using non-Windows are described in a later section.
How to use the submission tool
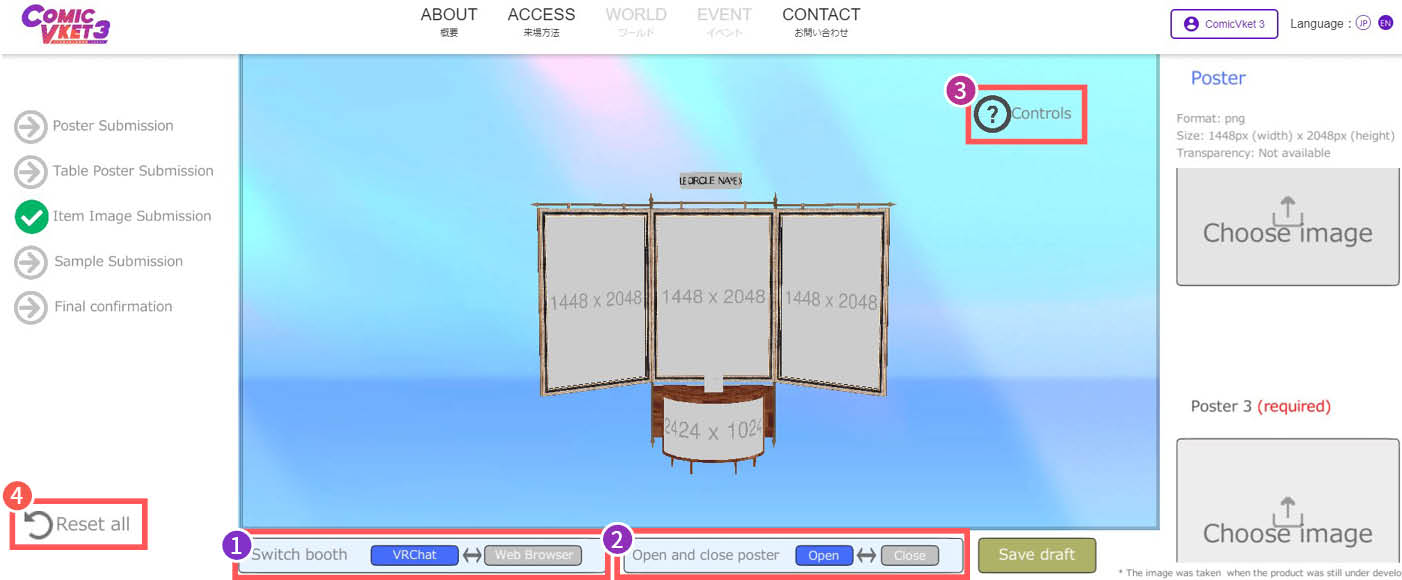
①Switch Booth
The booth shape differs between VRChat and Vket Cloud. Toggle the button to display the preview.
②Poster Open/Close
You can open and close the posters in a booth of VRChat. Toggle the button to display the preview.
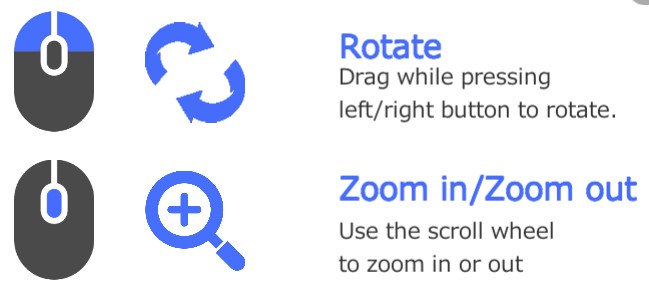
③How to Operate
Click here to see the explanations of how to control the tool. Rotate the model with left or right mouse drag. Zoom in and out by scrolling the mouse wheel.
④Reset All
Click this button to remove all uploaded images.
When all required fields are filled in each submission page, the arrow "→" mark of the steps on the left will change to a check mark.
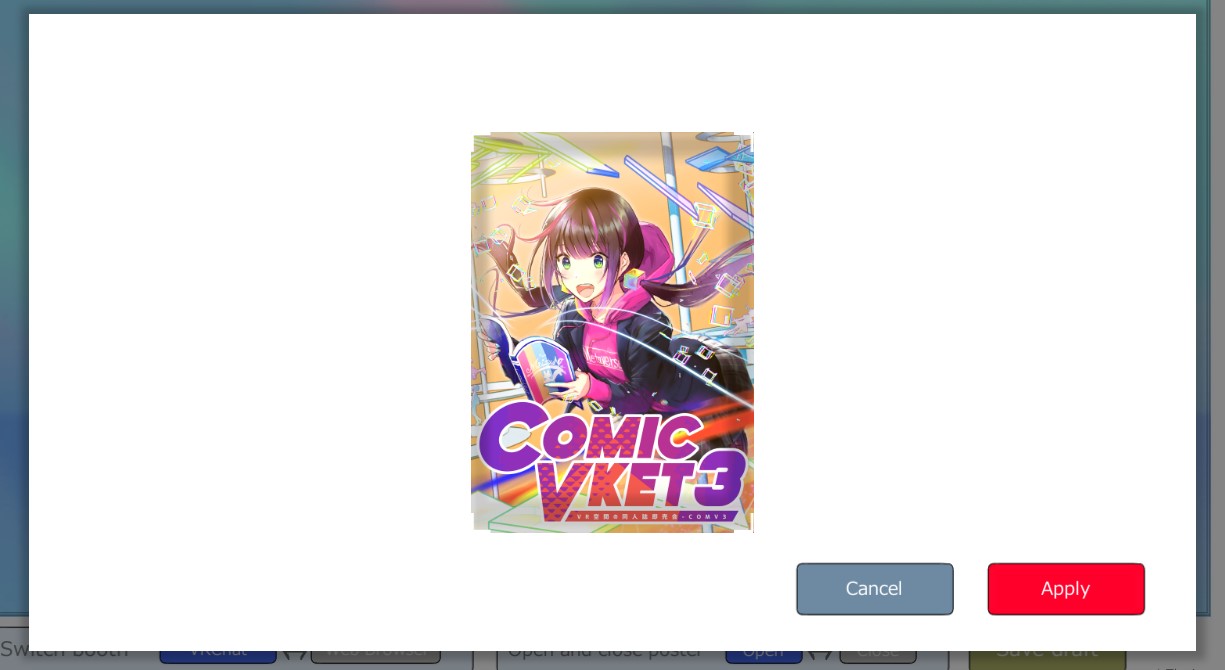
Poster Images
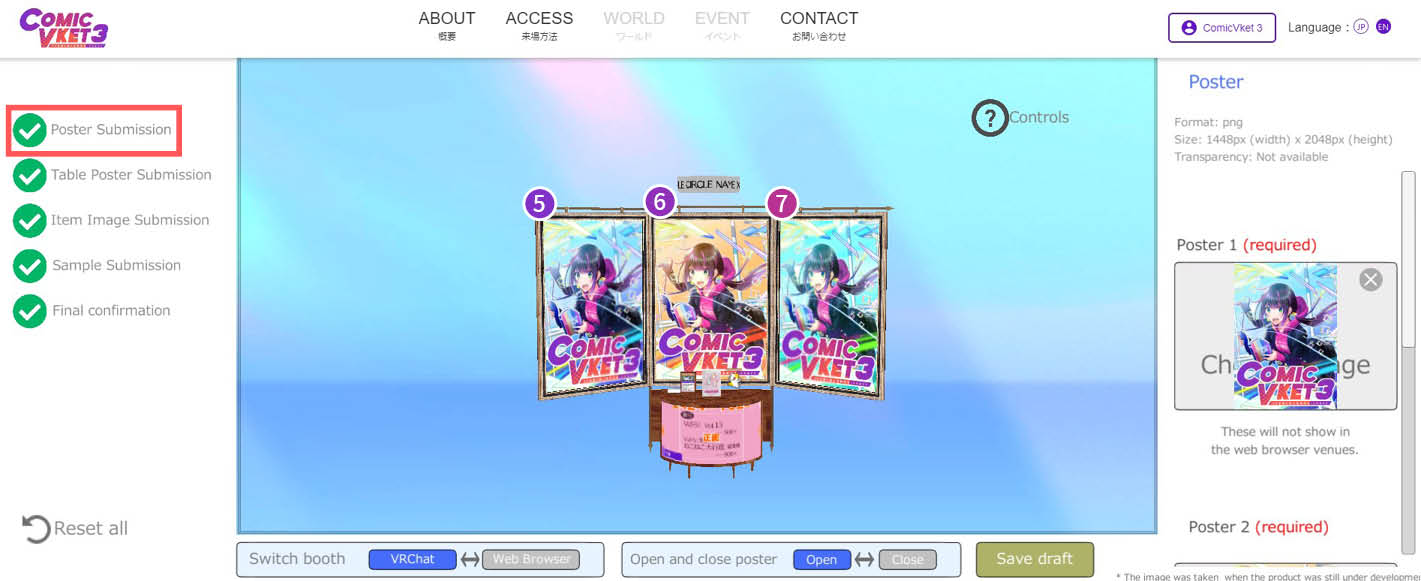
*If the image exceeds the specified size, you can crop it to the specified size.
⑤Poster 1 (Inside left of the triangular prism)
*Outside of this, Poster 2 is displayed.
⑥Poster 2 (Central front and back, and outside left and right of the triangular prism)
*This is the only poster that will be displayed in a Vket Cloud booth.
*In a VRChat booth, these posters will be displayed in 4 places in a booth.
⑦Poster 3 (Inside right of the triangular prism)
*Outside of this, Poster 2 is displayed.
Table cover poster
Click "Table Poster Submission" from the steps on the left.
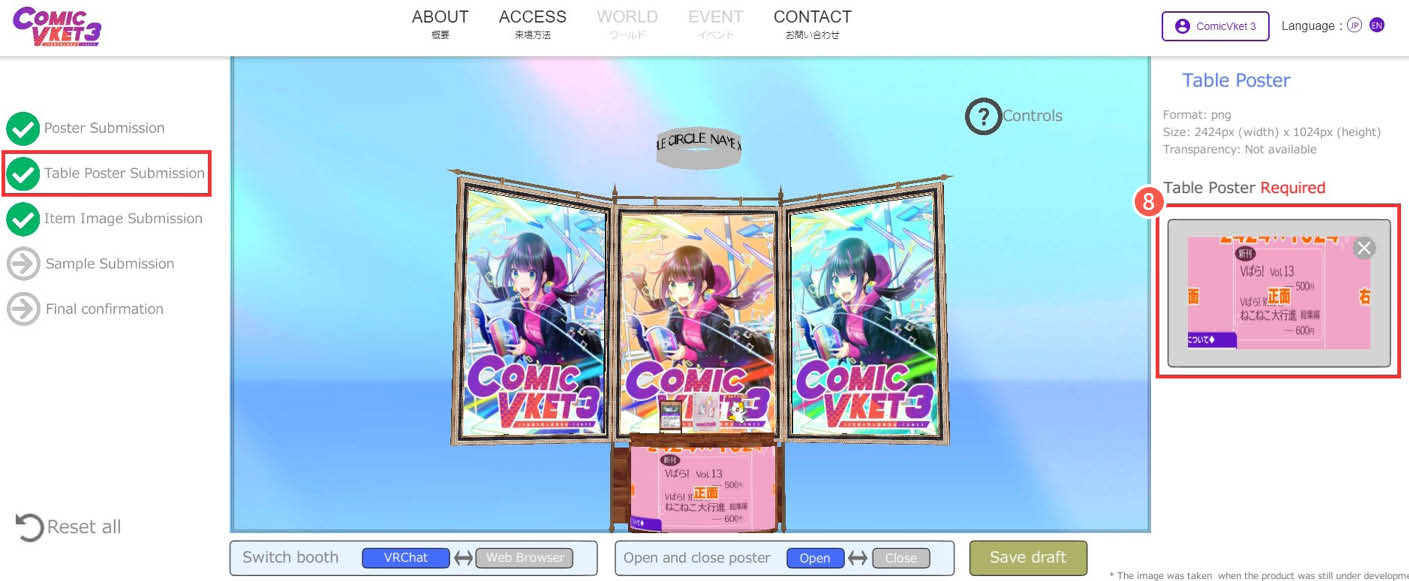
⑧ Table cover poster
The poster will cover the front side of the half-round table.
Images for decorations on the desk
Click "Item Image Submission" from the steps on the left.
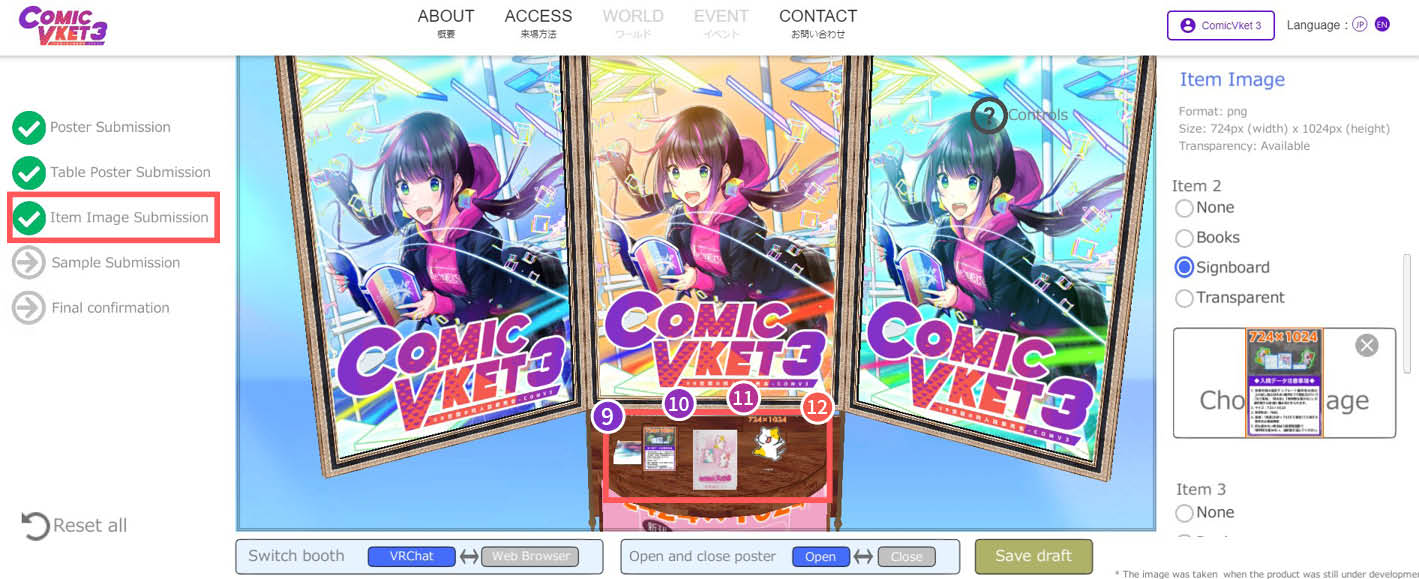
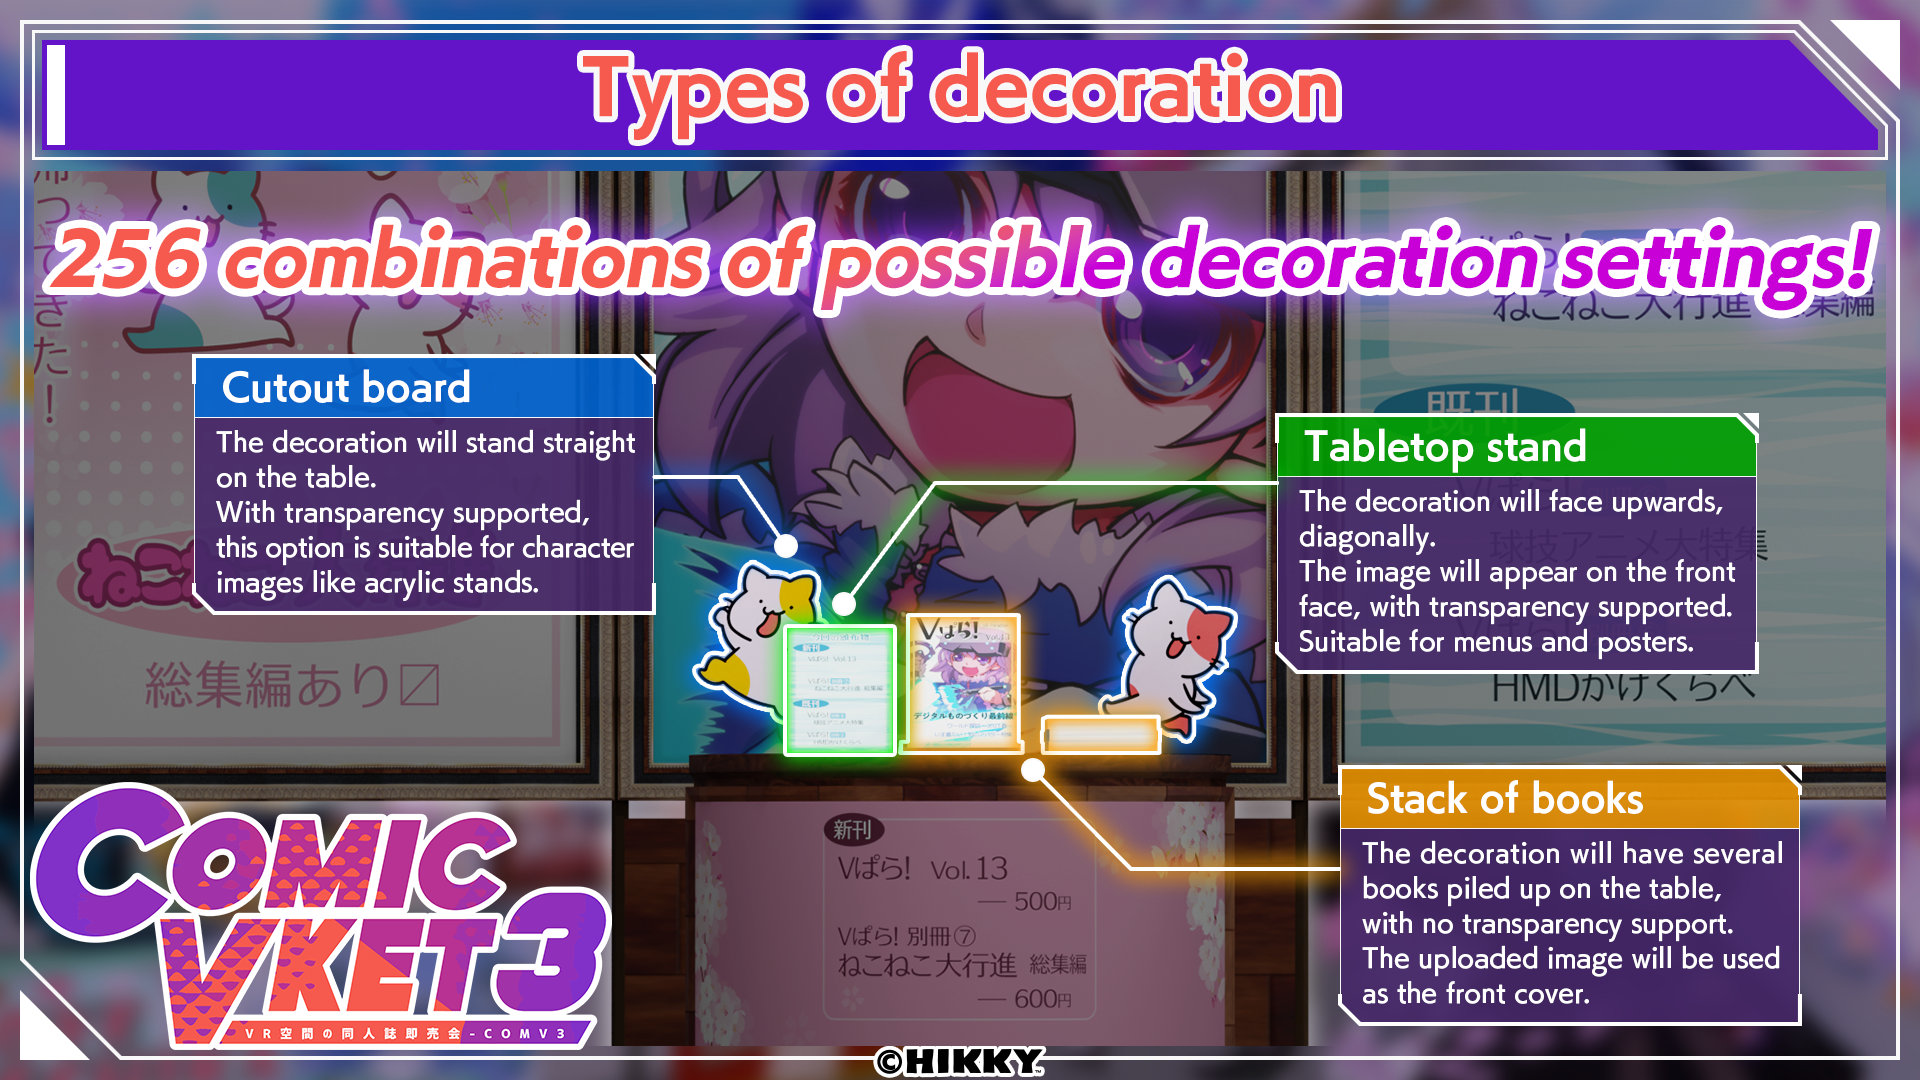
Up to four decoration objects can be placed on the desk. You can choose from the following three types of objects for each slot. For details, please refer to the "Details of Displayed Objects" image above.
- Stack of books
- Tabletop stand
- Cutout board
If you prefer to omit the slot, select "None".
⑨Decoration 1
⑩Decoration 2
⑪Decoration 3
⑫Decoration 4
Sample Pages
Click "Sample Submission" from the steps on the left.
Visitors can open and read your sample like a actual book.
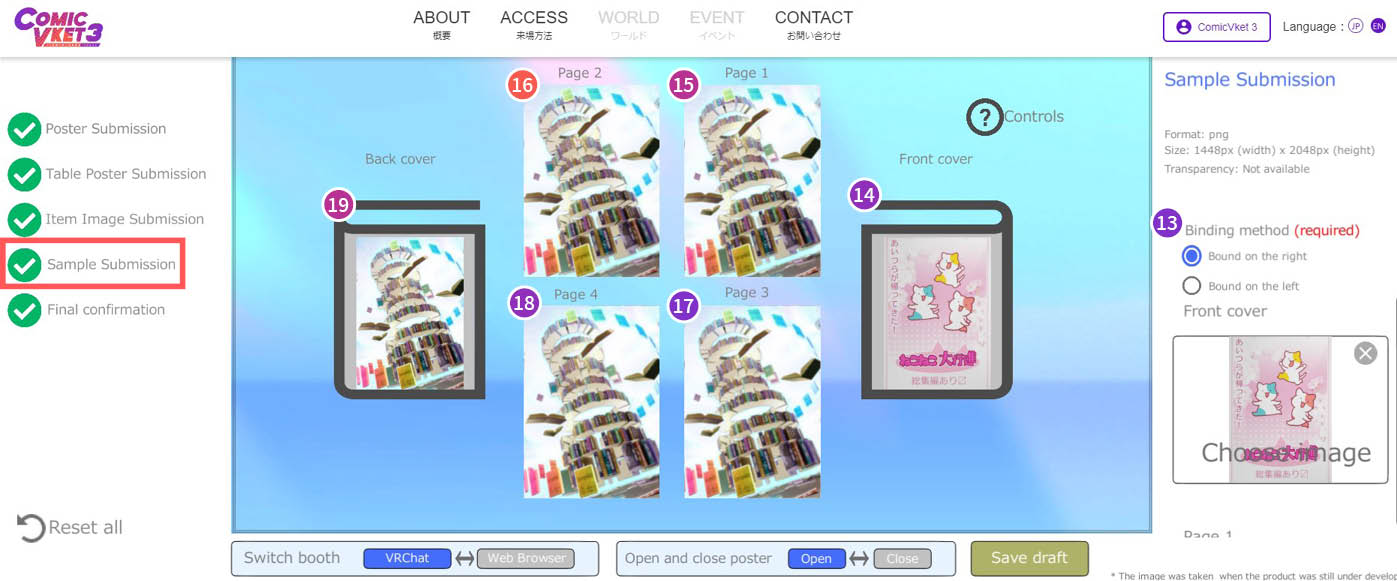
⑬Select the binding method
*Note that the layout of the submission screen will change according to the binding method selected.
⑭Cover
⑮Page 1
*If you want the back side of the cover to be white, please upload a white image here.
⑯Page 2
⑰Page 3
⑱Page 4
⑲Back cover
Final Confirmation
Click "Final Confirmation" from the steps on the left.
You can re-submit images as many times as you like during the submission period.
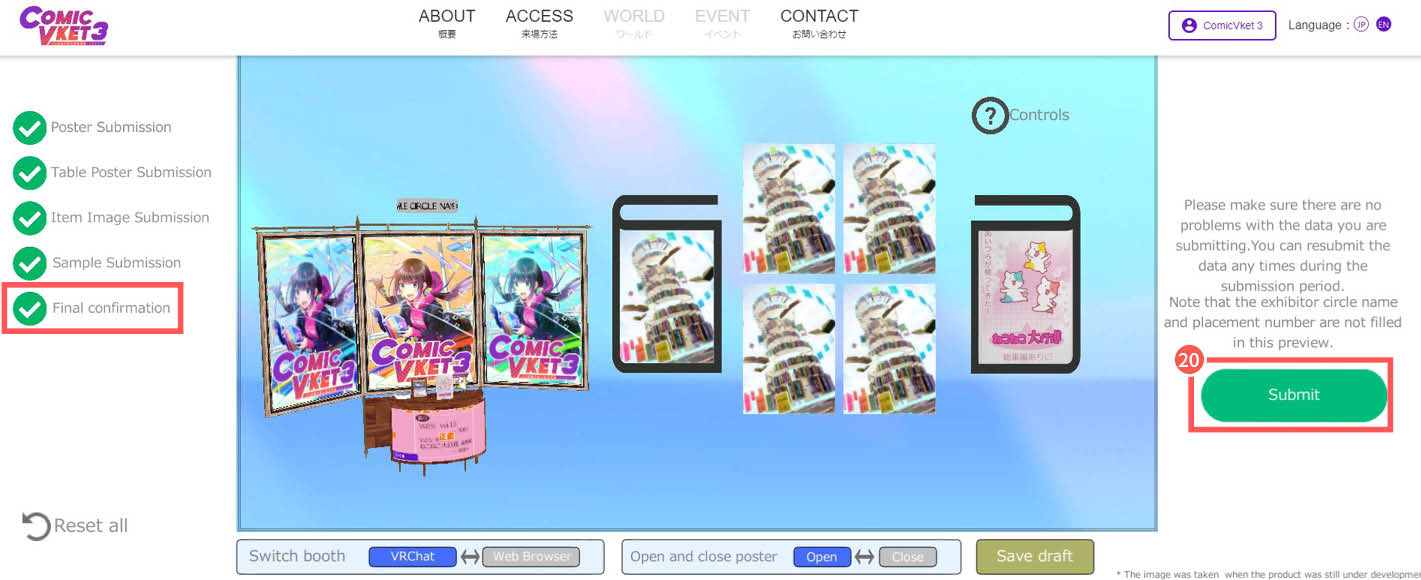
⑳Submission
*If the required fields are not filled in, you cannot click this button. Please check the displayed error and upload the images accordingly.
Submission Procedure (non-Windows)
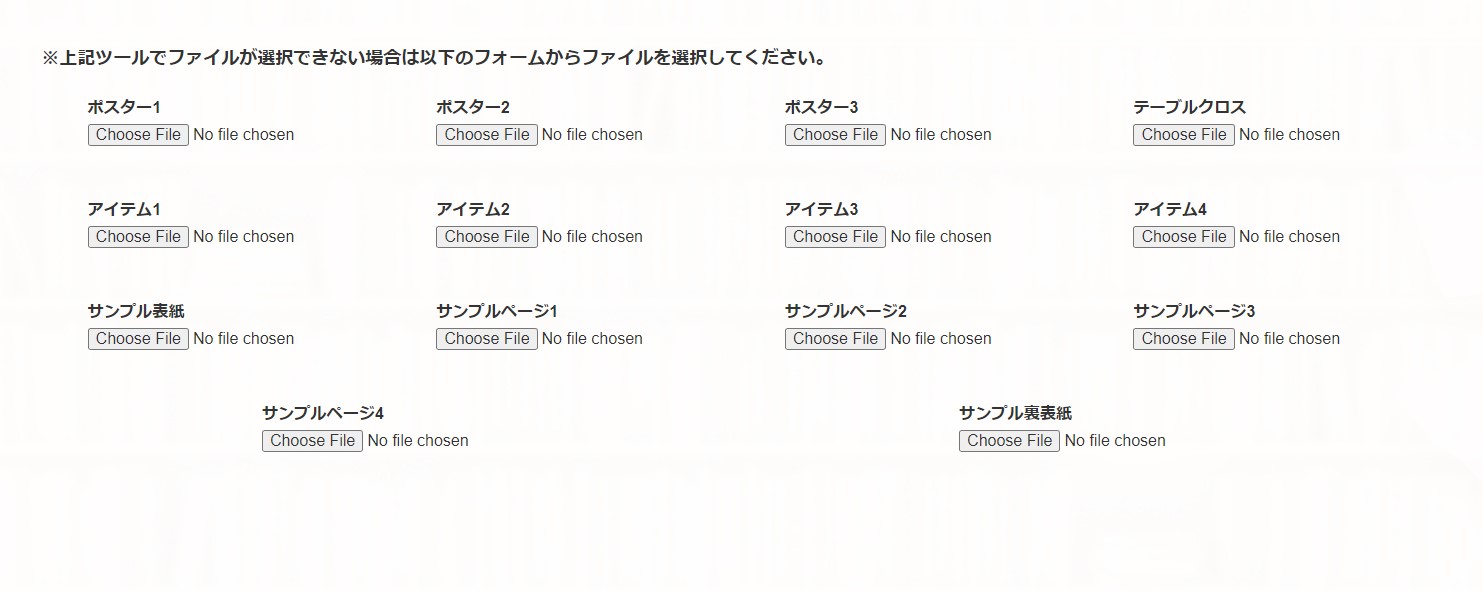
If you need to submit images from a non-Windows environment, you can upload them from the Simple Uploader.
If the image exceeds the specified size, you can crop it to the specified size.
Scroll down and upload all images.
When you submit from the Simple Uploader, you will not be able to check the appearance of the booth. Refer to the images in the "Submission Procedure (Windows)" section.
5. Data submission for exhibition space (Simple Plan)
This is the exhibition plan for submitting a single image, such as a page from a novel.
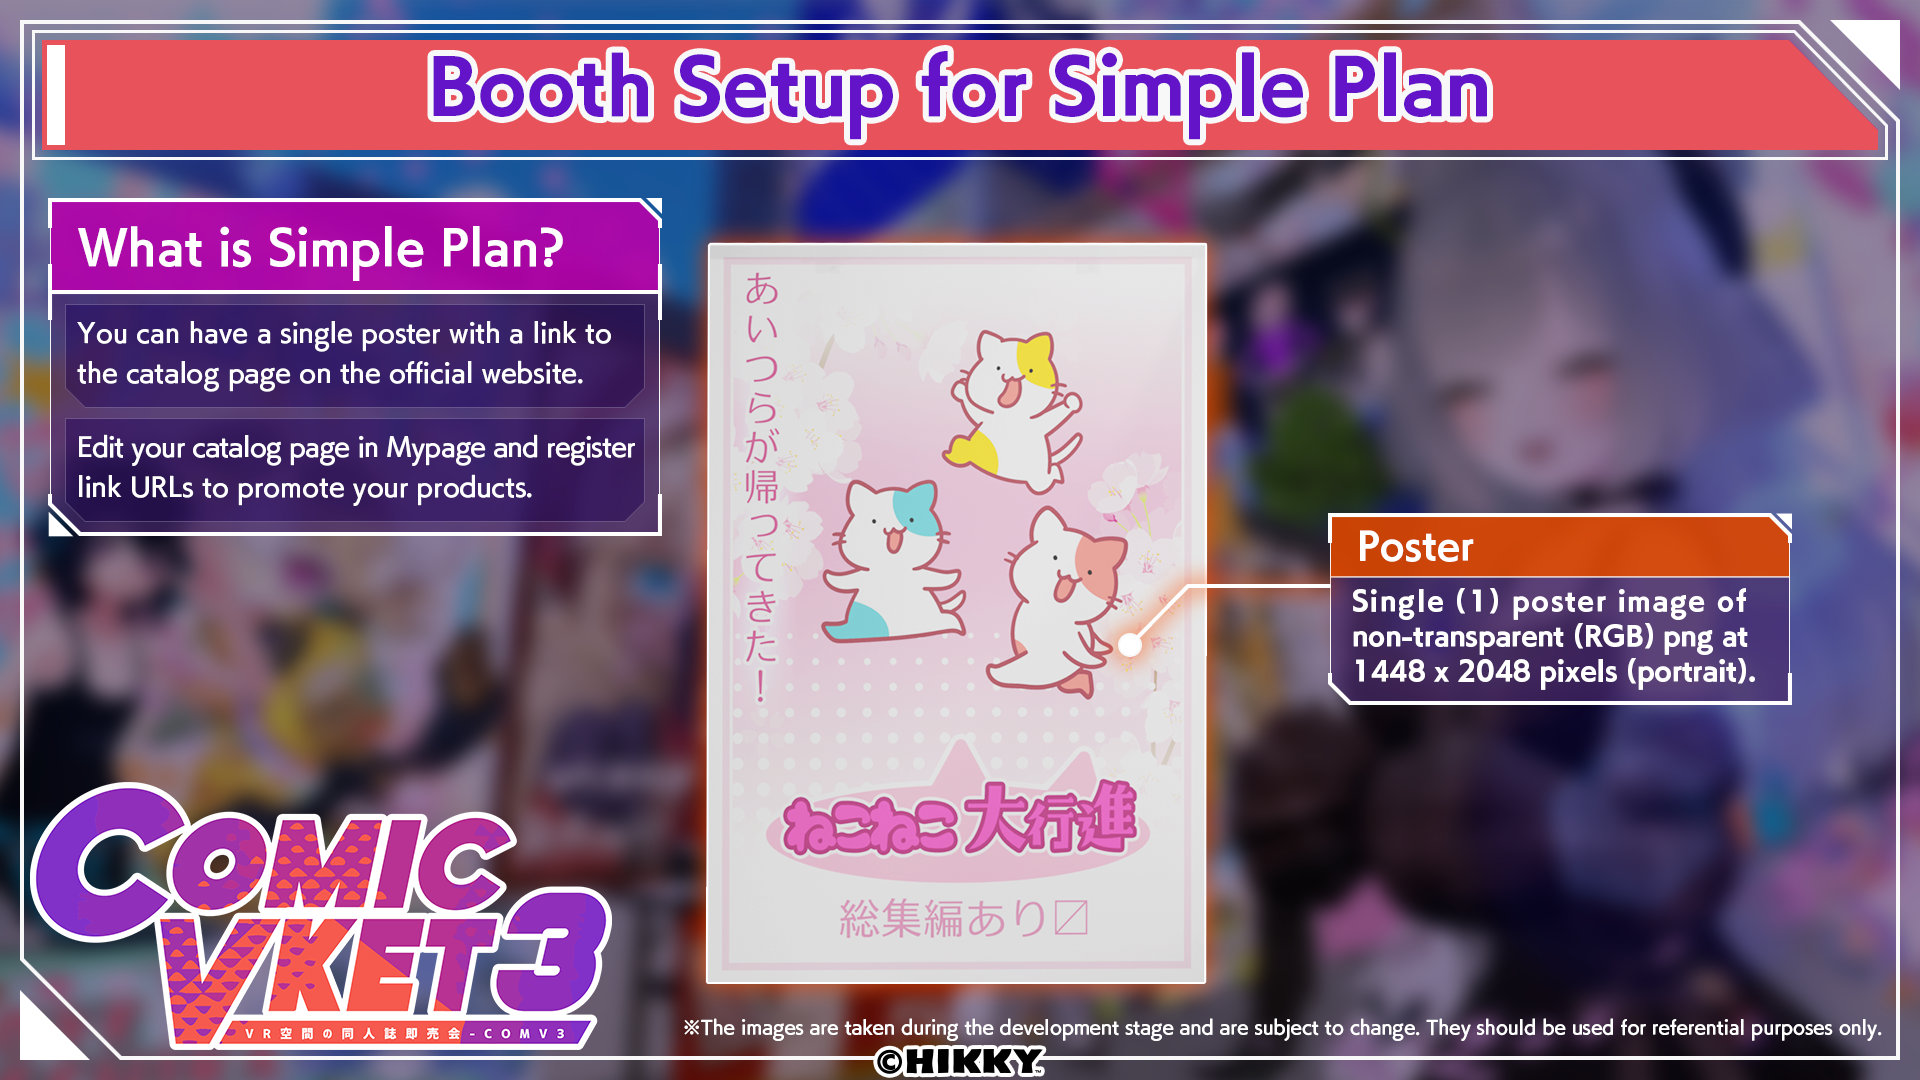
Necessary files
The below files need to be submitted.
| Category | Number | Size | Format | Color |
|---|---|---|---|---|
| Poster | Single (1) | 1448 x 2048 px (portrait) | png | non-transparent (RGB) |
Submission Procedure
Once the files are ready let's move on to upload them. Click "Start Web Submission" in "Upload and Manage Data" page under "MyPage".
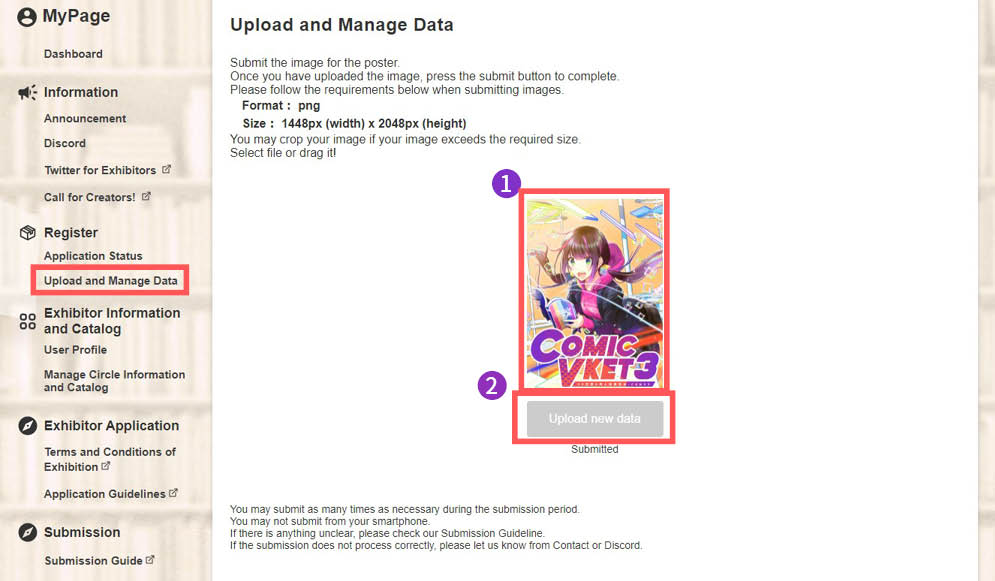
①Image Upload Area
There are two ways to upload an image:
- Drag and drop an image to the upload area
- Click on the upload area and select an image from a folder in your device
* If the image exceeds the specified size, you can crop it to the specified size.
②Submission
To complete the submission, you must click this button after uploading an image.
Uploaded images can be viewed on the "Manage Submissions" page.